Great! You received the edited document from your editor. Now it’s time to process the suggestions. Luckily, this is a piece of cake. In only two steps, you can make sure you get the most out of your editor’s feedback.

Step 1

Accept the changes

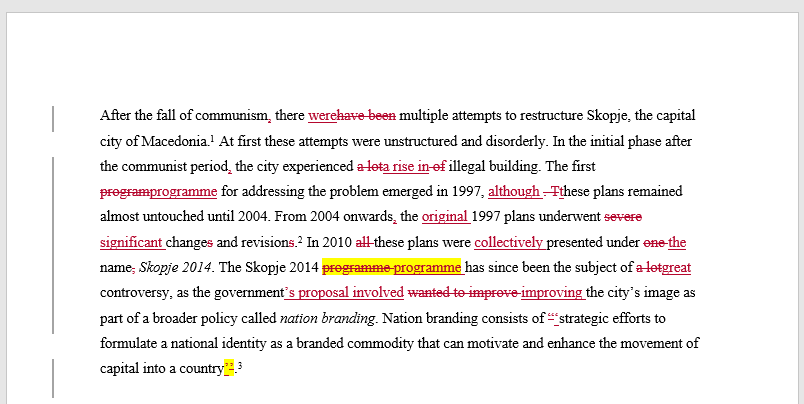
Start accepting the editor’s changes and implementing the feedback in the comments. You can accept or reject each change by clicking “Accept” or “Reject.” When you accept a change, always check that the grammar and punctuation (spaces, commas, and periods) are correct. Additionally, check to make sure that each sentence conveys what you intended it to say. After you click “Accept” or “Reject,” you will automatically be directed to the next change.

You can delete the comments one by one by clicking “Delete.” You can also right-click on the comment to delete it.

Step 2

Perform one final check

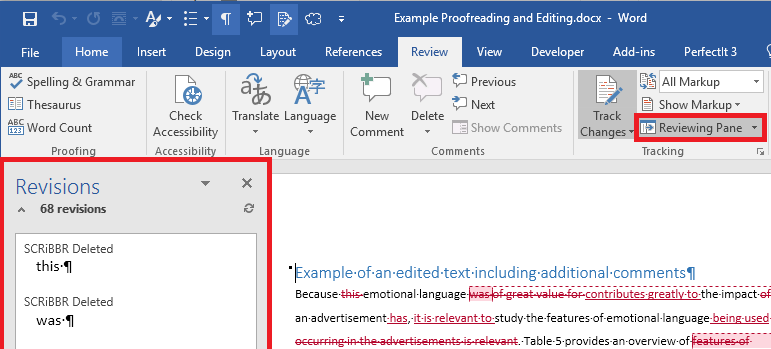
When you are done accepting and rejecting the changes, it is wise to do a final pass to ensure you’ve processed each correction and suggestion. Click on “Reviewing Pane”. This will allow you to see all the remaining changes and comments in the document.

Don’t forget to do a final spell check to ensure your text is free of common errors, such as duplicated punctuation and double spaces. Once you’ve processed all the changes and deleted all the comments, the changes will no longer be visible to others. You can submit this document as your final version!

Two final tips

  1. Read your final version one last time to make sure everything is as you’d like.
  2. Save your document as a .pdf file to come across more professional and to ensure the layout doesn’t change.

Common problems

Word crashes when I accept the changes.

When Word crashes or runs very slowly, this could be caused by the Reviewing Pane. Due to the number of changes and comments, there is a lot of content in the Revision Pane, which causes Word to run slowly and possibly crash.

The Reviewing Pane is the Pane on the left side of your screen that you can extend when you go to the Review tab.

Close this Reviewing Pane while you keep on working on your document.

If this does not solve your problem, please contact Scribbr via the chat or send an e-mail to info@scribbr.com.

I cannot see any redlining (changes).

Don’t panic! Sometimes you cannot see the changes straight away when you open the Word document, even though the changes of the editor are in there.

Step 1: Go to the ‘Review’ tab and select ‘All Markup’ in the drop down menu (Word 2019).

Step 2: Click on ‘Show Markup’ below ‘All Markup’ (Word 2019) and make sure all options are ticked.

Track Changes Word 2019
Show Track Changes (Word 2019)
Show Track Changes Word 2013
Show Track Changes (Word 2013)
Show Track Changes Word 2010
Show Track Changes (Word 2010)
Show Track Changes Word 2007
Show Track Changes (Word 2007)
Show Track Changes Word 2003
Show Track Changes (Word 2003)
Show Track Changes Word for Mac 2011
Show Track Changes (Word for Mac 2011)
I cannot see any comments.

Step 1: Go to the Review tab and select ‘All Markup’ in the drop down menu (Word 2019).

Step 2: Click on ‘Show markup’ below ‘All Markup’ and tick ‘Comments’ (Word 2019).

Show comments (Word 2019)
Show comments Word 2013
Show comments (Word 2013)
Show comments Word 2010
Show comments (Word 2010)
Show comments Word 2007
Show comments (Word 2007)
Show comments Word 2003
Show comments (Word 2003)
I cannot make the red vertical lines on the left side disappear.

This red line is there because there are still changes in the document that need to be accepted (which can be minor changes like double spaces or a wrongly placed comma).

Step 1: Go to the Review tab and click on ‘Accept’ (Word 2019).

Step 2: Click on ‘Accept All Changes and Stop Tracking’.

Accept all changes Word 2019
Accept All Changes (Word 2019)
Accept all changes Word 2013
Accept All Changes (Word 2013)
Accept all changes Word 2010
Accept all changes (Word 2010)
Accept all changes Word 2007
Accept All Changes (Word 2007)
Accept all changes Word 2003
Accept All Changes (Word 2003)
My text contains redundant changes.

You might come across redundant changes, where a word or punctuation mark is replaced by the same word or punctuation mark.
redundant-changes

Changes like these occur during the routine editing process, so there’s no cause for concern. There are two common reasons you might see such changes:

  • Our editors work in the “simple markup” view, so they can ensure they don’t introduce errors during the editing process. However, this means that editors sometimes delete a word and then retype it, and Word’s track changes will count this as an edit.
  • This can also happen when editors use spell check or other advanced editing tools, which allow the editor to review multiple instances of a word at once. Tools like this enable us to deliver a consistent edit, but they sometimes result in “unnecessary” changes.

If you see redundant changes in your text, you can simply accept or reject them.